Difference between revisions of "User:Kyres1/Sandbox"
m |
m |
||
| Line 121: | Line 121: | ||
* Mounted sleeper - A sleeper that permits the operator to scoop up people quickly, it's also fitted onto the back of the mech and comes with a variety of beneficial chemicals. | * Mounted sleeper - A sleeper that permits the operator to scoop up people quickly, it's also fitted onto the back of the mech and comes with a variety of beneficial chemicals. | ||
* Health analyzer - A health analyzer. That's it. | * Health analyzer - A health analyzer. That's it. | ||
* Crisis Drone - Automatically attempts to stabilize people nearby when activated. | |||
</div></div> | |||
<div class="toccolours mw-collapsible mw-collapsed" style="width:99%"> | |||
===[[File:Examplemech.png]] Mech Piloting=== | |||
Simple tips to piloting your new death robot. | |||
<div class="mw-collapsible-content"> | |||
====Basics==== | |||
Mechs are pretty much larger versions of your own character in operation, meaning that, mechanically speaking (not RP wise) it's as simple as utilizing normal hotkeys once you've climbed into the mech to navigate. | |||
To climb into the mech, drag your character's sprite onto the mech. Provided the canopy is open, you'll simply enter the mech after a brief delay. Any action will interrupt this process, especially being knocked over or pushed. | |||
If the hatch/canopy/roll cage/etc. is closed, simply click on the mecha itself to swing it open. | |||
Once you're inside, | |||
</div></div> | </div></div> | ||
Revision as of 01:38, 6 January 2020
Exosuits
Construction of exosuits are restricted by ID, so they are typically the product of roboticists and the Research Director. These can be tremendously helpful or tremendously annoying depending on who uses it. They take more work to make than robots and require special circuits, which are obtained through the Quartermaster or the Research and Development console.
Exosuits are wholly modular, meaning what you make can (mostly) be mixed and matched to create whatever vehicle you desire. From chicken-legged brawling mecha to tread-based taxis, the possibilities are endless.
The current list of exosuit parts is as follows.
Exosuit Construction
 The Frame
The backbone of the mech itself, this can be modified at any stage of construction.
To finish:
- Apply 15 steel sheets to the frame.
- Wrench the steel sheets in place.
- Weld the steel sheets in place.
- Wire the frame.
- Wire cutters to neaten the wiring.
- The following is the limitation and requirement for the frame's finished parts :
- - Motivators
- - Sensors
- - Manipulators
- - Chassis
- Once it's all applied, screwdriver to complete.
 The Parts
The actual defining features of the mech, appearance and performance wise. Each part has unique attributes that make them superior or inferior to the other parts, depending on situation.
Individual parts of the mech require various, smaller parts from the mech fabricator to finish. Robot parts are found under the "robot" tab specifically, not the exosuit tab itself.
To finish the motivators and manipulators:
- Apply one robot actuator.
To finish the sensors:
- Apply one robot camera.
- Apply one robot radio.
- Apply one exosuit control module, this is among the most important parts of the mech.
To finish the chassis:
- Apply the exosuit armor of your choice. This is very important as it judges the durability of your mech.
- Apply one power cell of your choice.
- Apply one robot diagnostic unit.
- Once it's all done, place the parts on the mech frame.
The Exosuit Control Module
The Exosuit Control Module takes very specific boards, but only two of any variety. This marks the limitation for modules that mecha can use. Theoretically, any mech can be used for any purpose with this system. The boards can be seen below.
- Basic Weapon Control - Controls the majority of weapons found in the exosuit fabricator. Without it, none of these can be utilized.
- Advanced Weapon Control - Controls the higher-end weaponry, such as X-RAYs and pulse cannons. Doesn't work for basic weapons without also using the basic weapon board.
- Utility Systems Control - Controls almost every utility system, such as clamps, drills and floodlights.
- Engineering Systems Control - Controls engineering systems such as the mounted RFD or fire extinguisher.
- Medical Systems Control - Controls medical systems such as sleepers, health analyzers and crisis drones.
 The Details
The specifics on each frame available to robotics.
Exosuit Frames
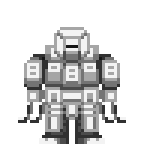
 Powerloader - Parts for an industrial-grade power loader. The modular mecha adaptation of the APLU "Ripley," tends to be utilized for mining and heavy lifting.
- Has decent armor across the board.
- Has an open chassis, not protected against the environment.
- Powerful, heavy manipulators with substantial damage per swing.
- Slow and bulky but hard to damage motivators.
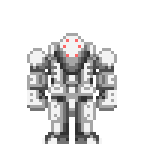
 Light Chassis - Parts for a light, maneuverable and fragile mech. The modular mecha adaptation of the Odysseus, tends to be utilized for medical response and scouting.
- Has terrible armor, generally.
- Has a sealed chassis, protected from the environment.
- Light, nigh harmless manipulators that are unable to damage windows or doors.
- Fast and agile motivators basically made of glass.
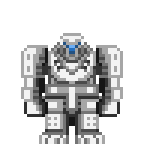
 Heavy Chassis - Parts for an absurdly large, heavy-duty mech. The modular mecha adaptation of the Durand, tends to be utilized for really big problem solving.
- Has phenomenal armor, generally.
- Has a sealed chassis, protected from the environment.
- Extremely heavy and equally slow motivators.
- The heaviest duty manipulators available, presumably carries the impact of a train.
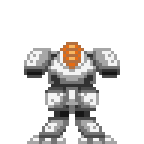
 Combat Chassis - Parts for a well-balanced combat mech. The modular mecha adaptation of the Gygax, tends to be utilized for dynamic combat situations.
- Has relatively good armor.
- Has a sealed chassis, protected from the environment.
- Moderately armored motivators, still quite fast.
- Quick, but light manipulators that don't have much force behind them.
Miscellaneous Parts
- Armored Treads - The fastest traditionally available motivators, very durable with terrible turning delay. Not good for maneuverable mechs, but great for straight lines.
- Hover Thrusters - A set of thruster motivators that permit flight and the total disregard of holes.
- Quadruped Motivators - A set of stable motivators that permit the scaling of walls and have instant turn speed.
- Spherical Pod Chassis - A spherical hoverpod chassis, in modular mech form! About as useless as its predecessor and only a little prettier.
Exosuit Armor
 Armor - The armor of your mech determines a plethora of things and can be changed depending on the specialty you expect for your mech. Some available are listed below.
- Basic exosuit armor - Simple enough, durable armor with no special attributes.
- Radiation-proof armor - Exactly what the name says, this will protect the user entirely from the threat of radiation.
- EM-resistant armor - EMP proofing, for your mech in effect.
- Combat armor - Extremely durable without the special attributes of the former plating.
 The Equipment
The wielded equipment, utilities and weapons of the mech available to robotics.
Weapons
- Electro-laser carbine - An electrode-based taser that doesn't pass through windows but does a mighty amount of pain to whoever it hits.
- Heavy Ion Cannon - A mech-mounted duplicate of the ion rifle. Two modes : stun, and lethal. Stun has ten shots, lethal has six. Can't be fitted onto shoulder slots.
- Mounted laser carbine - A laser rifle fitted onto a mech. Ten shots, all lethal. Can't be fitted onto shoulder slots.
- Mounted machine gun - A very robust ballistic autocannon for mech usage, very lethal.
Utilities
- Mounted Clamp - A sturdy clamp that can carry pretty much anything that isn't bolted down. Great for securely moving loaded crates. When loaded with an ore box, this automatically picks up anything you drill.
- Mounted Drill - A drill with an interchangeable head that excels at destroying pretty much anything in the game, from rocks to killer monsters to people to rocks again. More efficient the harder the head's material is.
- Floodlight - Very bright headlamps for exosuit mounting. Wonderful for just about any mech.
- Mounted Plasma Cutter - A robust plasma cutter for mech usage.
- Gravitational Catapult - A grav-pult with two modes ; area, and targeted selection. Utilizing either, you're able to push, pull or shove any object not bolted down.
Engineering
- Mounted RFD - An RFD with three modes ; construct wall/plating, deconstruct wall/plating/airlock, and construct airlock.
- Extinguisher - A very high capacity fire extinguisher.
Medical
- Mounted sleeper - A sleeper that permits the operator to scoop up people quickly, it's also fitted onto the back of the mech and comes with a variety of beneficial chemicals.
- Health analyzer - A health analyzer. That's it.
- Crisis Drone - Automatically attempts to stabilize people nearby when activated.
 Mech Piloting
Simple tips to piloting your new death robot.
Basics
Mechs are pretty much larger versions of your own character in operation, meaning that, mechanically speaking (not RP wise) it's as simple as utilizing normal hotkeys once you've climbed into the mech to navigate.
To climb into the mech, drag your character's sprite onto the mech. Provided the canopy is open, you'll simply enter the mech after a brief delay. Any action will interrupt this process, especially being knocked over or pushed.
If the hatch/canopy/roll cage/etc. is closed, simply click on the mecha itself to swing it open.
Once you're inside,