Difference between revisions of "Sandbox:KoalaDourado"
KoalaDourado (talk | contribs) (Updates "General" section text) |
KoalaDourado (talk | contribs) ("Origin" and "Occupation" text) |
||
| Line 29: | Line 29: | ||
*'''Name:''' Determines what your character will be identified by. Choose a first and last name only - nicknames are not allowed. | *'''Name:''' Determines what your character will be identified by. Choose a first and last name only - nicknames are not allowed. | ||
**'''Random Name:''' If you can't think of a name for your character, clicking this will cycle through pre-generated names. | **'''Random Name:''' If you can't think of a name for your character, clicking this will cycle through pre-generated names. | ||
*'''Sex:''' This option determines your character | *'''Sex:''' This option determines your character's sex, either male or female. | ||
*'''Pronouns:''' What pronouns your character goes by. Male, female or plural. | *'''Pronouns:''' What pronouns your character goes by. Male, female or plural. | ||
*'''Age:''' Sets the age of your character. Depending on the [[Job Guides|job]] you want to visit sooner or later, you'll want to set your age appropriately. | *'''Age:''' Sets the age of your character. Depending on the [[Job Guides|job]] you want to visit sooner or later, you'll want to set your age appropriately. | ||
| Line 63: | Line 63: | ||
**'''Set Robot Flavor Text:''' This is the same as the above, but pertains to when you play a cyborg, if you play a cyborg. Which is not recommended if you're playing for the first time. | **'''Set Robot Flavor Text:''' This is the same as the above, but pertains to when you play a cyborg, if you play a cyborg. Which is not recommended if you're playing for the first time. | ||
*'''Signature:''' A prompt that you can edit and stylize the way you want. If you changed your character's name, you will want to hit ''Reset'' first. This is mostly used for paperwork. | *'''Signature:''' A prompt that you can edit and stylize the way you want. If you changed your character's name, you will want to hit ''Reset'' first. This is mostly used for paperwork. | ||
==Origin== | |||
This tab provides some options regarding your character's background life. If you need further guidance on this, take a look at [[Guides/Character_Creation#Origins_-_Citizenship,_Language_and_Religion|this guide]]. | |||
*'''Culture:''' Choose the culture that your character belongs to. This changes what options will be available for '''Origin'''. | |||
*'''Origin:''' Where your character are from. Changes the options for '''Citizenship''' and '''Accent'''. | |||
*'''Economic Status:''' This setting determines your character's financial status, whether they are wealthy, impoverished, or somewhere in between. It affects how much will be available in the character's bank account. | |||
*'''Citizenship:''' This option determines your character's official current citizenship. | |||
*'''Religion:''' Here you can choose your character's religious beliefs. | |||
*'''Accent:''' This menu item determines the type of accent your character has. | |||
==Occupation== | |||
The Job Selection screen is a crucial part of character creation that displays a list of available roles. Some of these roles are marked as '''[WHITELISTED]''' or [NEVER], which is perfectly normal. The whitelisted positions are typically reserved for the head-of-staff roles, which you don't need to worry about at the moment. | |||
*'''Character Faction:''' This option determines what faction your character's works for. For a quick overview of the Megacorporations, you can refer to [[Guides/Character_Creation#The_Scary_Megacorporations|this section.]] | |||
For your first round, you should toggle the ''Assistant'' role to [YES]. Assistants have no specific responsibilities, so you are free to explore the game as you wish. Feel free to ask others for help or directions, but keep in mind that you are in the lowest position in the [[Chain of Command]], so listen to your superiors. Once you feel comfortable with the game mechanics, you may want to try out other roles. | |||
==Loadout== | |||
This area mostly has to do with items that you'll spawn with if you selected them. You're limited to 10 loadout points, and each item costs a certain amount of points. It should also be noted that certain items are job restricted. | |||
==Other== | |||
This is for when you have incident reports logged against your character from other characters. It's more for character complaints than player complaints, but you probably don't need to worry about this. | |||
==Roles== | |||
This is for special role candidacy, usually antagonists, and lets you play as an antagonist if the gamemode permits. If they're not already, set all of the options to No. You'll want to stay away from playing as an antagonist for now. | |||
==Global== | ==Global== | ||
| Line 75: | Line 99: | ||
*'''Static Space:''' Overrides the parallax option and just makes space turf look simple. Enable if you feel motion sick from parallax. | *'''Static Space:''' Overrides the parallax option and just makes space turf look simple. Enable if you feel motion sick from parallax. | ||
*'''Language Keys:''' Prefix characters to put in front of what you say to determine the language that you speak. These can be left alone. | *'''Language Keys:''' Prefix characters to put in front of what you say to determine the language that you speak. These can be left alone. | ||
=Your First Round= | =Your First Round= | ||
Revision as of 15:17, 12 April 2023
Welcome to Space Station 13, a game that offers rich player interaction and, on this server and many others, a unique roleplay experience. This guide is designed for new players who are just starting their journey into the world of SS13 and BYOND in general. It's important to note that reading the rules is essential to ensure a smooth and enjoyable stay on the server. Failure to do so may result in a short-lived experience.
BYOND
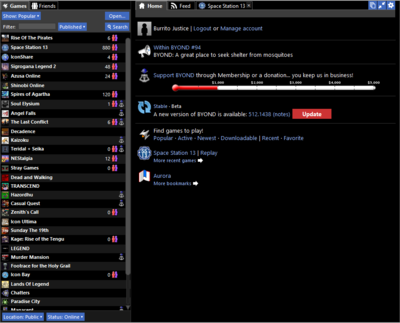
BYOND - Build Your Own Net Dream - is the awful, archaic, and probably cursed engine that SS13 uses, and it must be downloaded in order to join any server. You can easily download the latest version by visiting the BYOND website. You will also need to create an account before you can join any servers.
After installing BYOND and creating an account, click the field next to Filter and type in "Space Station 13". The hub entry should appear, and you will likely see a list of servers, including Aurorastation. If you're unable to find Aurorastation, you can click Board The Aurora on this link. This will automatically open BYOND and take you to the server.
You're In!
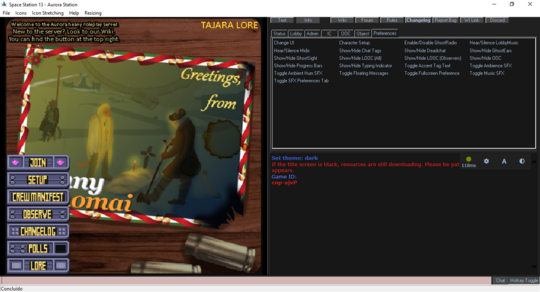
If you've successfully joined the server, you'll see the blank Dream Seeker screen. Once it disappears, you'll be presented with a split-screen interface. On the left side, you'll see the server's title screen with clickable options, and on the right side, you'll see a set of commands (also known as verbs) and the chat log.
If the left side is blank, it means that the server is still streaming resources to your computer, which may take a minute or two. However, this is a one-time process that usually only occurs the first time you join the server.
Fundamentals
Before we can continue, there are a few things we should make sure you know before you dive headfirst into the chaos action.
- Make sure you've read the rules!
- Be sure to check the Guide to Controls for how to control your character.
- This is a roleplay server, so make sure that your character and their actions are believable for the setting.
- Your first round may be rough.
With that out of the way, we can continue to character creation!
Your First Character
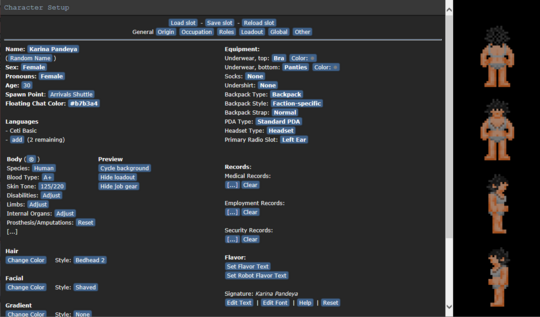
On the left side of the screen, you'll see a menu of options, including Setup. Click on this to open the character creation window, which should look similar to the picture on the right. For now, the only button at the top you need to worry about is the 'Save slot' button, which you should click regularly to avoid losing your progress. Below the save slot button, you'll see a row of buttons that allow you to customize your character's appearance and attributes. Keep in mind that your character should fit in with the server's setting!
General
During character creation, you'll need to choose a few key details to define your character. Here's what you'll see on the left side:
- Name: Determines what your character will be identified by. Choose a first and last name only - nicknames are not allowed.
- Random Name: If you can't think of a name for your character, clicking this will cycle through pre-generated names.
- Sex: This option determines your character's sex, either male or female.
- Pronouns: What pronouns your character goes by. Male, female or plural.
- Age: Sets the age of your character. Depending on the job you want to visit sooner or later, you'll want to set your age appropriately.
- Spawn Point: This will determine where you spawn if you join the round late.
- Languages: How many languages your character knows. By default, you know Ceti Basic, and you have space to add two more languages. However, it is not mandatory to select additional languages.
- Body: This button will randomize your character's body, age, and sex.
- Species: Clicking this will bring up a list of species you can play as. You can only play as a human until you've signed up for a race whitelist, so this is safe to ignore for now.
- Blood Type: Determines what blood type you'll have, but you don't have to keep track of what it is.
- Skin Tone: Adjusts the tone of your character in a range from 1 to 220, with 1 being pale and 220 being dark.
- Disabilities: This option allows you to choose disabilities that will be inflicted on your character, which can have mechanical changes in gameplay and limit job options. As a beginner, it may be best to leave this alone for now.
- Limbs: Brings up a list of your body parts, and whether or not you want the limb in question to be missing or replaced with a prosthesis. You may want to leave amputation alone, prosthetics function a little differently than organic limbs when damaged.
- Internal Organs: Lets you replace organs with augmented/synthetic variants. Functionally identical to their organic counterparts until damaged.
- Prosthesis/Amputations: Shows a list of everything that's been amputated/replaced, if you explored the two options above, as well as a button to reset your limbs/organs to default.
- Hair: Allows you to select a hair style and color for your character.
- Facial: Choose a facial hair style and color. Note that this option is only available to male characters.
- Gradient: This option allows you to choose a color gradient and style for your character's hair.
- Eyes: Lets you pick your eye color.
- Body Color Presets: Brings up three options of body color presets for you to choose.
- Body Markings: Option that brings up a list of decals to place on the body, like augmentations and tattoos.
- Equipment: Here you will set some of the clothing and devices for your character.
- Underwear: What sort of garments your character has under their clothing.
- Socks: Socks. They go on your feet.
- Undershirt: A shirt that goes under the uniform.
- Backpack Type: Determines the sprite of the backpack you'll be wearing. Note that duffel bags can hold more, but inflict a speed penalty.
- Backpack Style: Determines whether the sprite of your backpack will reflect your department's colors and style (if you're in one), or if it should just be a plain grey.
- Backpack Strap: How the backpack strap will show on your character's sprite.
- PDA Type: What type of PDA your character uses. It has many useful features, so do not choose "Nothing".
- Headset Type: Select what type of radio used by your character. A headset is essential, so again, do not choose "Nothing".
- Primary Radio Slot: Which ear the radio will be set to.
- Records: Character records, documents used by other's in the ship to bring information about you. You don't need to touch these options until you're more familiar with the server's setting, but templates and a really useful Record Generator may be found here.
- Flavor: No, not how you taste. Flavor text is essentially your character's visual description.
- Set Flavor Text: When you click on this, you will see a prompt with several sections, but for now, focus on the General section. Write a brief description of your character's characteristics, such as height, build, complexion, and hair style. This field is only for things that can be noticed at a glance, not your character's whole backstory.
- Set Robot Flavor Text: This is the same as the above, but pertains to when you play a cyborg, if you play a cyborg. Which is not recommended if you're playing for the first time.
- Signature: A prompt that you can edit and stylize the way you want. If you changed your character's name, you will want to hit Reset first. This is mostly used for paperwork.
Origin
This tab provides some options regarding your character's background life. If you need further guidance on this, take a look at this guide.
- Culture: Choose the culture that your character belongs to. This changes what options will be available for Origin.
- Origin: Where your character are from. Changes the options for Citizenship and Accent.
- Economic Status: This setting determines your character's financial status, whether they are wealthy, impoverished, or somewhere in between. It affects how much will be available in the character's bank account.
- Citizenship: This option determines your character's official current citizenship.
- Religion: Here you can choose your character's religious beliefs.
- Accent: This menu item determines the type of accent your character has.
Occupation
The Job Selection screen is a crucial part of character creation that displays a list of available roles. Some of these roles are marked as [WHITELISTED] or [NEVER], which is perfectly normal. The whitelisted positions are typically reserved for the head-of-staff roles, which you don't need to worry about at the moment.
- Character Faction: This option determines what faction your character's works for. For a quick overview of the Megacorporations, you can refer to this section.
For your first round, you should toggle the Assistant role to [YES]. Assistants have no specific responsibilities, so you are free to explore the game as you wish. Feel free to ask others for help or directions, but keep in mind that you are in the lowest position in the Chain of Command, so listen to your superiors. Once you feel comfortable with the game mechanics, you may want to try out other roles.
Loadout
This area mostly has to do with items that you'll spawn with if you selected them. You're limited to 10 loadout points, and each item costs a certain amount of points. It should also be noted that certain items are job restricted.
Other
This is for when you have incident reports logged against your character from other characters. It's more for character complaints than player complaints, but you probably don't need to worry about this.
Roles
This is for special role candidacy, usually antagonists, and lets you play as an antagonist if the gamemode permits. If they're not already, set all of the options to No. You'll want to stay away from playing as an antagonist for now.
Global
This section entails settings that are independent of character slots, and will be persistent throughout your experience.
- UI Style: Lets you pick from a few different styles of UI. Midnight should work just fine.
- Play admin midis: If enabled, this will allow you to hear music or other sounds uploaded by admins mid-round. They're typically not MIDIs anymore, though.
- Play lobby music: Safe to ignore, just provides some
loud and obnoxiousmusic in the lobby that will probably get stale really quick. - Ghost ears/sight/radio: Will determine the range at which you hear/see actions if you're observing the round as a ghost. Setting the first two options to Nearest Creatures will probably spare you a lot of text from filling your log.
- Space Parallax: Determines if the space background moves or doesn't move when you move. Purely aesthetic.
- Space Dust: Extra particle effects out in space. Again, aesthetic.
- Progress Bars: Shows a bar over your character when you conduct a task that requires time to complete. You should probably leave this on.
- Static Space: Overrides the parallax option and just makes space turf look simple. Enable if you feel motion sick from parallax.
- Language Keys: Prefix characters to put in front of what you say to determine the language that you speak. These can be left alone.
Your First Round
Once you've got everything set and ready, go ahead and hit Save slot (you should have been clicking it often, anyway), close the window, and click Join Game! to bring up a list of jobs to join as. You'll want to click assistant. If, however, you're present before a round starts, and you can't find the Join Game! button, then click Ready instead, and you'll be spawned in automatically once the round starts. Depending on when you join and what the round type is, the station around you can either look calm and quiet or completely unpowered with scorch marks lining the walls and screams echoing throughout the corridors. If you joined during the former situation then you're in luck because you'll be able to learn how to familiarize yourself with many mechanics without worry. No matter which spawn point you chose (except borg storage), you'll always end up on the surface level of the station.
The Interface
SS13 is rather sensitive with what you click on, and since you can only click on something one way, that means there's probably only one way to interact with it. This isn't the case here, as aside from using modifiers like holding Control or Shift there are a few interface objects to toggle how you interact with items or even other people.
Inventory
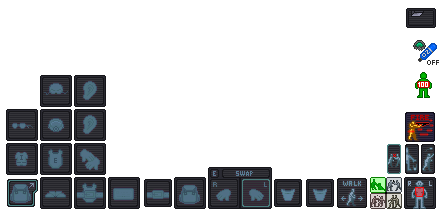
The middle and left side of your screen is your inventory and item slots. From top to bottom, left to right, they are:
- Main Inventory - Accessed by pressing the toggle button in the bottom left corner
- Helmet, right ear
- Glasses, mask, left ear
- Uniform, outer clothing, gloves
- Expand/collapse inventory, shoes, outer clothing storage
- Easy Access Inventory - Always visible
- ID
- Belt
- Backpack
- Right and left hand
- Pockets
Object Interaction
The bottom right side of the screen will contain a number of buttons that will change how you interact with objects or people around you. These are:
 Movement Intent
 Intents
- Help - You won't do harm by clicking on someone empty handed. Will also prevent you from firing ranged weapons by default.
- Disarm - You will knock items out of hands and potentially knock people to the ground.
- Grab - You will grab someone.
- Harm - You will punch someone if you click them.
 Targetting Window - Useful for precision stuff, mainly used for combat and surgery.
 Resist - You will resist out of physical incapacitation. Will also make you drop to the floor to put yourself out, should you be on fire.
 Drop - Will drop the item in your active hand.
 Throw - Will toggle throwing. Clicking somewhere with an item in your hand will throw it in that direction. If an item is thrown at you and you have an empty hand, you will catch the item.
 Toggle Gun Mode - Will determine if you shoot at who you click or if you will aim at them instead, which will bring up a few more options.
Status
Most of these icons are hidden, but if they were all active on the screen, then they would be:
 Ceiling - Informs you if there's a ceiling above you.
 Toxin - You're currently breathing in a toxic substance.
 Fire - You're currently on fire.
 Ice - You're currently freezing.
 Oxy Warn - You're not breathing enough oxygen.
 Pressure Warn - You are in a low/high pressure environment without protection.
 Internals Toggle - Will toggle your internal atmosphere on or off. You must be wearing a suitable mask and have a tank of air/oxygen in your immediate inventory.
 Health Doll - Will give you a rough estimate of how you're doing. This isn't 100% accurate, as pain will influence what this indicator looks like.
 Temperature Warn - Will inform you if you're too hot or too cold.
 Nutrition - Will pop up if you are hungry, or if you've eaten too much.
Exploring
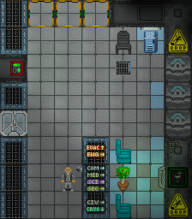
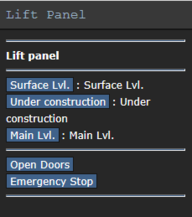
So now you're actually playing the game, congrats! If you've already read this page, then you should already have a rough idea of how to move your character around. The surface level of the station - or at least, the portion you're on - isn't really that big, so you won't get lost too easily. The north side is the docks, one of which you probably arrived at if you left your spawn point in character creation alone. Far south is a portion of cargo and a merchant dock. To the east is a pool, and around the middle is cryo, a garden, tool storage, and the elevators. Once you're done looking at stuff, go ahead and make your way to the elevators and click the dimmed yellow button to summon the elevator. Step inside and click the button that takes you to the main level, which is where the station usually operates, and where you'll likely find other people.
