Sandbox2:Lavillastrangiato
Welcome to Space Station 13, a game that offers rich player interaction and, on this server and many others, a unique roleplay experience. This guide is designed for new players who are just starting their journey into the world of SS13 and BYOND in general. It's important to note that reading the rules is essential to ensure a smooth and enjoyable stay on the server. Failure to do so may result in a short-lived experience.
BYOND
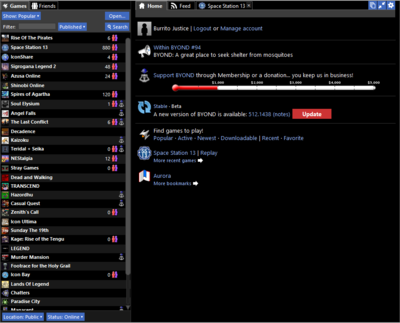
BYOND - Build Your Own Net Dream - is the awful, archaic, and probably cursed engine that SS13 uses, and it must be downloaded in order to join any server. You can easily download the latest version by visiting the BYOND website.
A BYOND account also must be created before you can join any servers.
After installing BYOND and creating an account, click the field next to Filter and type in "Space Station 13". The hub entry should appear, and you will likely see a list of servers, including Aurorastation. If you're unable to find Aurorastation, you can click Board The Aurora on this link. This will automatically open BYOND and take you to the server.
You're In!
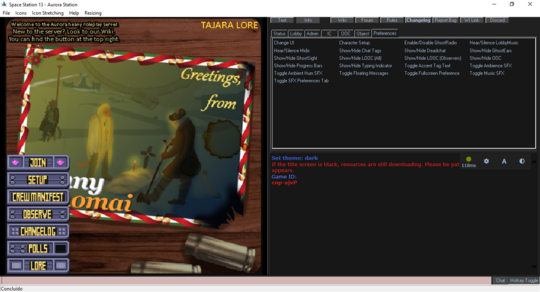
If you've successfully joined the server, you'll see the blank Dream Seeker screen. Once it disappears, you'll be presented with a split-screen interface. On the left side, you'll see the server's title screen with clickable options, and on the right side, you'll see a set of commands (also known as verbs) and the chat log.
If the left side is blank, it means that the server is still streaming resources to your computer, which may take a minute or two. However, this is a one-time process that usually only occurs the first time you join the server.
Fundamentals
Before we can continue, there are a few things we should make sure you know before you dive headfirst into the chaos action.
- Make sure you've read the rules!
- Be sure to check the Guide to Controls for how to control your character.
- This is a roleplay server, so make sure that your character and their actions are believable for the setting.
- Your first round may be rough.
With that out of the way, we can continue to character creation!
Your First Character
See: Character Creation
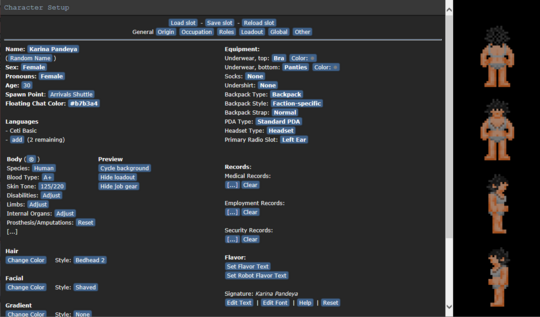
On the left side of the screen, you'll see a menu of options, including Setup. Click on this to open the character creation window, which should look similar to the picture on the right. For now, the only button at the top you need to worry about is the 'Save slot' button, which you should click regularly to avoid losing your progress. Below the save slot button, you'll see a row of buttons that allow you to customize your character's appearance and attributes. Keep in mind that your character should fit in with the server's setting!
Global
This section entails settings that are independent of character slots, and will be persistent throughout your experience.
- UI Style: Lets you pick from a few different styles of UI. Midnight should work just fine.
- Custom UI: If you want to use a custom color.
- Tooltip Style: Sets the tooltip style. You can leave
- HTML UI Style: Chooses the HTML interface. The default is fine.
- FPS: Set max FPS.
- Play admin midis: If enabled, this will allow you to hear music or other sounds uploaded by admins mid-round. They're typically not MIDIs anymore, though.
- Play lobby music: Safe to ignore, just provides some
loud and obnoxiousmusic in the lobby that will probably get stale really quick. - Ghost ears/sight/radio: Will determine the range at which you hear/see actions if you're observing the round as a ghost. Setting the first two options to Nearest Creatures will probably spare you a lot of text from filling your log.
- Observer LOOC: Toggles wether Local OOC typed in by observers will show up to you.
- Space Parallax: Determines if the space background moves or doesn't move when you move. Purely aesthetic.
- Space Dust: Extra particle effects out in space. Again, aesthetic.
- Progress Bars: Shows a bar over your character when you conduct a task that requires time to complete. You should probably leave this on.
- Floating Messages: This option enables sent messages to float above the character that said them. By default, it is set to "Yes" and can be left that way.
- Hotkey Mode Default: This option toggles between control modes. The Hotkey Mode is a highly useful feature, so make sure to leave it "On".
- Language Keys: Prefix characters to put in front of what you say to determine the language that you speak. These can be left alone.
Your First Round
Once you've got everything set and ready, go ahead and hit Save slot (you should have been clicking it often, anyway). Close the Character Setup window, if the game is already going on, you can click Join Game! to bring up a list of jobs to join as. You'll want to click assistant. If, however, you're present before a round starts, and you can't find the Join Game! button, then click Ready instead, and you'll be spawned in automatically in the Tool Storage once the round starts.
Depending on when you join and what the round type is, the ship around you can either look calm and quiet or completely unpowered with scorch marks lining the walls and screams echoing throughout the corridors. If you joined during the former situation then you're in luck because you'll be able to learn how to familiarize yourself with many mechanics without worry. No matter which spawn point you chose you'll always end up on the Lower Deck of the ship.
The Interface
SS13 is rather sensitive with what you click on, and since you can only click on something one way, that means there's probably only one way to interact with it. This isn't the case here, as aside from using modifiers like holding Control or Shift there are a few interface objects to toggle how you interact with items or even other people.
Inventory
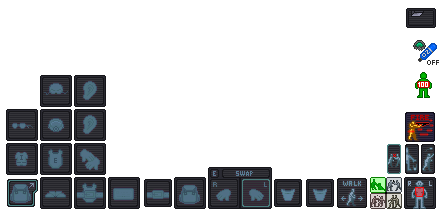
The middle and left side of your screen is your inventory and item slots. From top to bottom, left to right, they are:
- Main Inventory - Accessed by pressing the toggle button in the bottom left corner
- Helmet, right ear
- Glasses, mask, left ear
- Uniform, outer clothing, gloves
- Expand/collapse inventory, shoes, outer clothing storage
- Easy Access Inventory - Always visible
- ID
- Belt
- Backpack
- Right and left hand
- Pockets
Object Interaction
The bottom right side of the screen will contain a number of buttons that will change how you interact with objects or people around you. These are:
 Movement Intent
 Intents
- Help - You won't do harm by clicking on someone empty handed. Will also prevent you from firing ranged weapons by default.
- Disarm - You will knock items out of hands and potentially knock people to the ground.
- Grab - You will grab someone.
- Harm - You will punch someone if you click them.
 Targetting Window - Useful for precision stuff, mainly used for combat and surgery.
 Resist - You will resist out of physical incapacitation. Will also make you drop to the floor to put yourself out, should you be on fire.
 Drop - Will drop the item in your active hand.
 Throw - Will toggle throwing. Clicking somewhere with an item in your hand will throw it in that direction. If an item is thrown at you and you have an empty hand, you will catch the item.
 Toggle Gun Mode - Will determine if you shoot at who you click or if you will aim at them instead, which will bring up a few more options.
Status
Most of these icons are hidden, but if they were all active on the screen, then they would be:
 Ceiling - Informs you if there's a ceiling above you.
 Toxin - You're currently breathing in a toxic substance.
 Fire - You're currently on fire.
 Ice - You're currently freezing.
 Oxy Warn - You're not breathing enough oxygen.
 Pressure Warn - You are in a low/high pressure environment without protection.
 Internals Toggle - Will toggle your internal atmosphere on or off. You must be wearing a suitable mask and have a tank of air/oxygen in your immediate inventory.
 Health Doll - Will give you a rough estimate of how you're doing. This isn't 100% accurate, as pain will influence what this indicator looks like.
 Temperature Warn - Will inform you if you're too hot or too cold.
 Nutrition - Will pop up if you are hungry, or if you've eaten too much.
Exploring
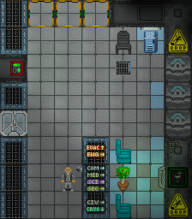
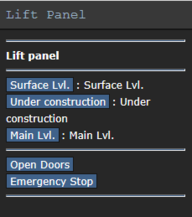
So now you're actually playing the game, congrats! If you've read the Guide to Controls, then you should already have a rough idea of how to move your character around. If you joined mid-round, you will appear in the Residential Deck Lifts, on the Lower Dec. But if you join with the start of the round, you will appear in the Tool Storage, which is located in the Main Deck. You can check the Server Map for an overview of the SCCV Horizon.
The ship is divided into three main sections: the Lower Deck, the Main Deck, and the Upper Deck. The Lower Deck generally includes hangars and some utility departments, such as Custodial and Operations. The Main Deck, as the name suggests, houses almost all of the main departments, including Security, Engineering, Medical, and Research. The Upper Deck is mainly for Command and entertainment areas. While exploring the ship, you will come across these departments, but you won't be able to enter most of them as an Assistant due to clearance restrictions. Nonetheless, take the opportunity to familiarize yourself with the layout of the ship.
Keep in mind that a round typically lasts around two hours. If you need to leave before then, you can return to the Residential Deck Lifts in the Lower Deck and use either the Living Quarters Lift or the Cryogenic Freezer to exit the round.
After your first round, you may want to move on to an actual job. Some beginner-friendly occupations include:
- Janitor: Walk around the Horizon to learn its layout while performing custodial tasks.
- Hangar Technician: Do deliveries and sort the warehouse to get familiar with handling items in the game.
- Engineering Apprentice: Gain hands-on experience in Engineering, but make sure there are other Engineers available to help you.
- Medical Intern: The learner role of the medical department.
- Lab Assistant: Learn how to be a scientist after some work experience.
Additionally, interacting with other players can make the game more enjoyable and engaging. Try to stay in character and be creative with your interactions, but also be respectful of other players and their characters. Remember that everyone is here to have fun, so don't take things too seriously or get upset if something doesn't go as planned. Don't hesitate to ask for help if you're unsure about something. You can do so in-character (IC) or out of character (OOC). Most players are happy to assist newcomers, whether it's with small tasks or getting familiar with a particular department.
Good luck! Template:Gameplay Guides
