User:Chada1/Sandbox
Overview: The Tesla Engine
(Please note that this guide assumes you have a basic knowledge of the station layout, but limited knowledge of the engineering department layout specifically, and as such, will assume you can do things like “go to the surface level” without being told exactly what steps to take. If you need more help, please ask for help in-character.)
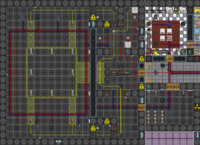
So, the Tesla engine. What is it? Chances are, you’ve never even heard of it before, because it’s tucked away on the Engineering sub-level, and it’s rather out of the way. Or if you have heard of it, you’ve probably heard that it’s an infernal death machine; something that only insane people or the ignorant attempt to utilize. What’s important to know is that, when assembled correctly, the Tesla engine can be a helpful asset, and safer than the Supermatter Engine to operate. It’s more than capable of powering the station all by itself, and you don’t have to deal with the threat of radiation, hallucinations, toxic gas, phoron fires, and complete delamination.
What You Need and Where to Find It
When you spawn into the game or arrive later, you begin in the Engineering Foyer. To get properly equipped, you’ll need to head over to the Engineering Storage room, which can be found beyond the two double doors to your left.
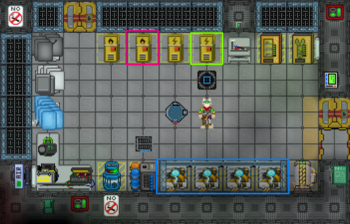
Inside this room, you have access to all the safety gear that you might need. The table below will explain further.
- Insulated Gloves

- For protecting your precious hands from electrical shock. Note: DO NOT use Budget Insulated Gloves. Ever.
- Can be found in the Electrical Supplies Locker (Green Square)
- Welding Mask

- For protecting your eyes from damage while welding. Note: Goggles also work.
- Available in the Welding Supplies Locker (Pink Square)
- Voidsuit

- When combined with Insulated Gloves, it makes the Tesla’s arcs harmless and not deadly. Note: They will still stun you.
- Available in the Engineering Voidsuit Storage (Blue Square)
Once you’ve gathered these items, make sure to put them on (save for the voidsuit, which isn’t necessary until you actually fire the engine), and then head onto your next location, Hard Storage, which you’ll find northward.
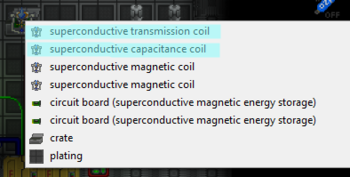
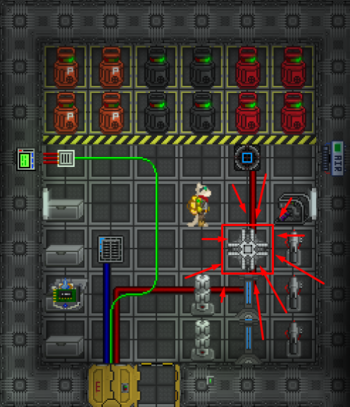
Once inside, you’ll want to go for the Green Crate, and you’ll want to take the following two highlighted things, as they’ll be needed to make the engine able to properly power the station.
The Engine Room: Where do I find it?
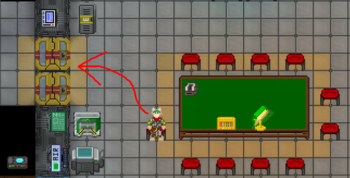
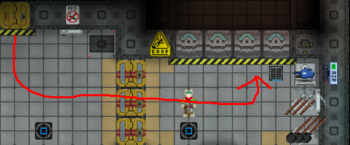
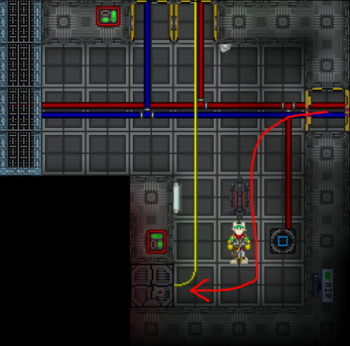
Once you have the items that were mentioned above, you’ll need to head down to the Engineering Sublevel, which can easily be accessed from the elevator.
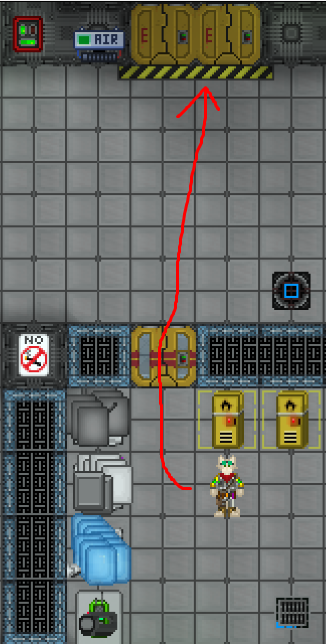
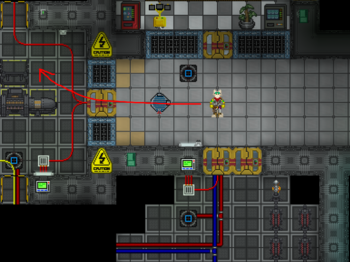
Follow that along, and you’ll soon find yourself outside the secondary Engine Room.
You’ll want to head further inside with the Superconductive Coils from earlier.
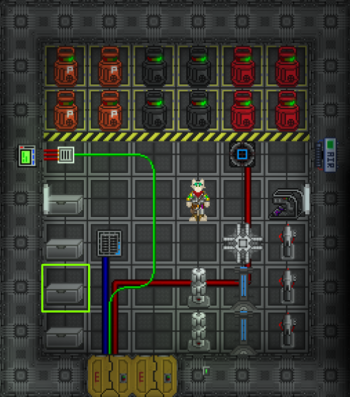
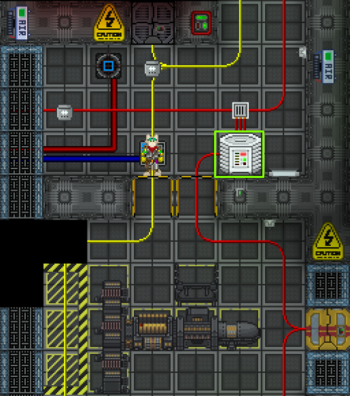
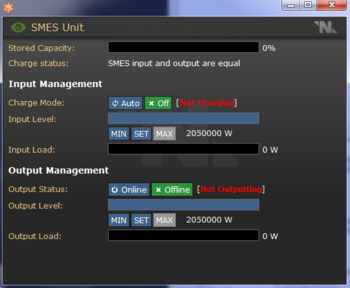
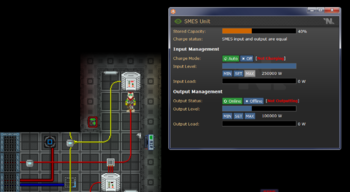
You’ll want to bring the Coils to the SMES unit that’s highlighted above, screwdriver its maintenance panels open, insert them both into it, and then screwdriver it closed once again. The coils will greatly increase the amount of power that the SMES unit can store, and output as well. Feel free to alter the settings as you see fit, but my personal settings are always putting both settings on maximum, like shown further below.
(Note: A SMES unit can’t output more power than it’s inputting, so it’s always best to set their Input value to MAX. Output can be adjusted as is necessary to increase or decrease the amount of energy in the main power grid.)
Assembling the Particle Accelerator
The Particle Accelerator is a vital piece of equipment for setting up the engine. It can be done first, or last, but it’s ultimately required to jumpstart the engine so that it’ll produce power. It does this by firing accelerated particles at the Tesla Generator; so don’t stand in front of it when it’s active, or you’ll be irradiated!
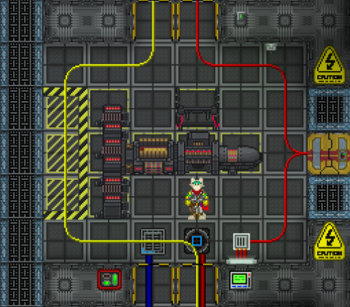
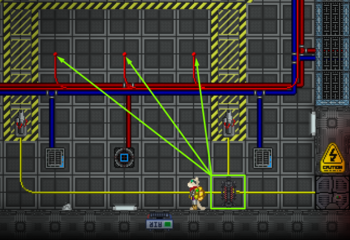
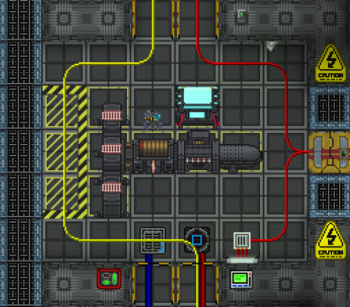
The pieces of the PA all start in the places that they need to be, so wrench them all to secure the pieces in place. Following that, you should use some cable to start adding wires to the components. They should look like this if done properly:
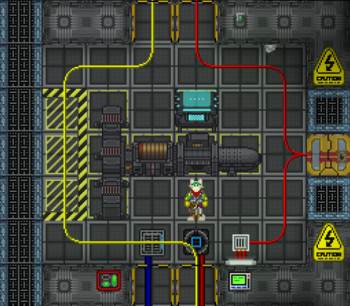
Once wired, you should then close their panels by using a screwdriver, at which point the assembly should look like this;
Assembling the Engine
To start properly assembling the Engine, you’ll need to grab the components from inside the storage room.
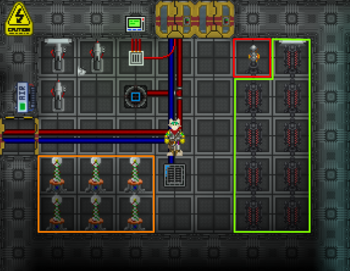
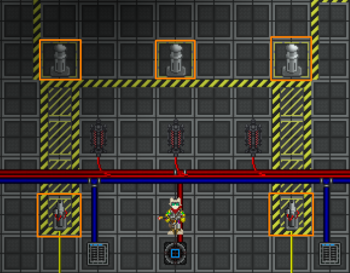
The devices highlighted in green are Tesla Coils, which are vital pieces of equipment for generating power. When the Tesla fires arcs of lightning, tesla coils convert it into usable electricity.
The devices highlighted in orange are the Grounding Rods, which don’t generate any power, however they instead exist as safety equipment. They’re placed in certain locations within the engine room in order to attract the tesla arcs to them. That means, standing near them stops you from getting fried by a stray arc of lightning.
The device highlighted in red is the Tesla Ball Generator, which is what turns into the giant ball of electricity when shot by a Particle Accelerator. It is the last part that should go into the engine setup, and is consumed in the reaction that jumpstarts the engine; so don’t let it go to waste.
To begin setting up the engine, first drag the Tesla Coils into the engine room.
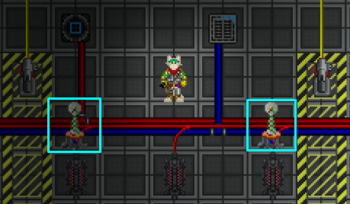
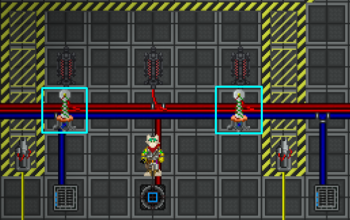
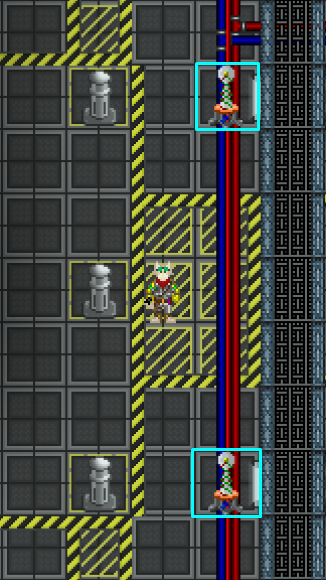
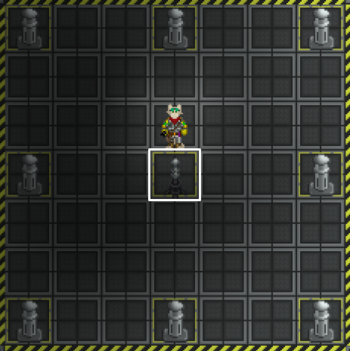
Once you’ve taken them inside, you’ll notice three wire knots on the North, South, and West sides of the engine room, making nine in total. Which is handy, because there are exactly nine Tesla Coils as well. The Tesla Coils need to be placed above each wire knot, and wrenched into place, like in the image below. And you’ll want to use them all, or the engine won’t make enough power.
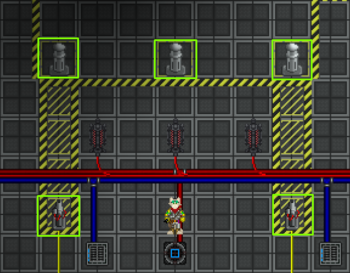
Once you’ve secured all nine Tesla Coils, you’ll want to turn to these devices, the Emitters, and the Field Generators.
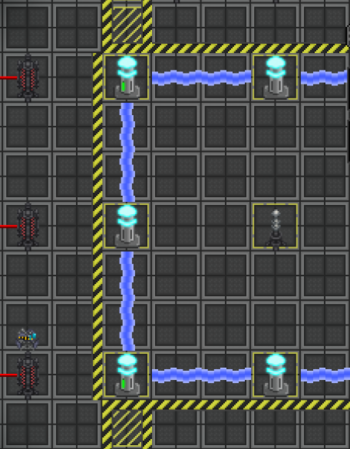
Both of these need to be wrenched into place. There are four emitters in total; two on the south side of the engine room, and two on the north side. As for field generators, there are eight, and they form a square around the center of the room; they also need to be wrenched down, as well.
Next, flip down your welding mask or goggles, because you also need to weld down each emitter and field generator too, or they won’t function. The reason behind this is that these pieces of equipment are also used in the outdated Singularity Engine setup, and they needed to be able to resist immense gravitational pull; not that the Tesla emits one, however. But nonetheless, flip those goggles down, and weld all those pieces down too. Four emitters, and eight field generators.
Next, go back to storage and start carrying out the Grounding Rods. These don’t have specific locations that they’re absolutely required to be placed in, just so long as they’re placed and wrenched down. My prefered locations for them are as follows; South, East, and North.
Once you’re done with those, go back into storage, grab the Tesla Ball Generator, and put it in the very center of the engine room, like so;
And once you’ve done that, head back into the observation room for now.
Final Steps
There are a few final steps for the Tesla Engine to make it safe and effective. The first one being a bypass from the Tesla Grid to the Containment Grid, which will be explained below.
First, go to the northernmost SMES unit, and change its settings to match the image below.
This SMES will always start with 40% charge, which is important, as the input and output need to be enabled in order for the engine room emitters to work properly. If this isn’t enabled, the emitters will draw from the room’s APC, which does not have enough capacity to sustain them, and the containment field will fail mid-firing.
Once the containment SMES is enabled, we’re ready to start up the engine.
Firing the Engine
Head into the engine room once more, and turn on all four emitters by clicking on them, and make sure they stay on. Pay attention to the warning markings on the floor, and don’t walk into the beams, because they can very easily kill you -- even with a voidsuit on. Don’t forget to swipe your ID card on them after you’ve turned them on to lock the controls, so that nobody can turn them off.
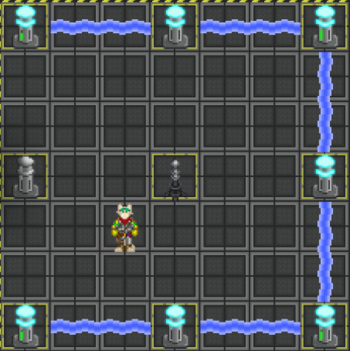
Once the emitters are up, head into the central square, and start turning on each of the field generators by clicking on them, as well. Make sure to click on them all, even the ones not being shot by emitters, but don’t get yourself stuck inside! Generally a good idea is to turn on just seven, then step outside before enabling the last one, like so.
Make sure NOT to walk into the energy field, or you’ll be launched back, and that’ll hurt quite a bit on its own. But you might also fly into a wall or window or piece of machinery, and that’ll hurt even more. This can and will kill you if you’re careless. Make sure to be careful, and watch your step. Also, if you do trap yourself inside the energy field, call out over the radio and ask another engineer or the AI to disable the containment SMES so that the emitters are no longer powered. You’ll have to wait for the field generators to run out of power (just a couple seconds) for the energy fields to fail.
Once you do step outside the square, enable the last generator, and it should look like this.
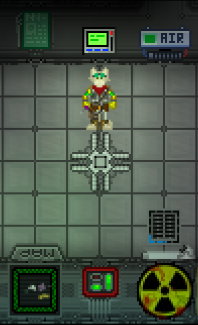
Now that this is done, you’re finally ready to turn on the Particle Accelerator! Go back into the observation room, activate the Control Computer (Run Scan for parts if you haven’t already), turn the PA’s power up to 2, and turn it ON. It should look like this;
(Note: I walked into the energy field and died so I had to respawn as a drone. BE CAREFUL!)
Once you enable the Particle Accelerator, it’ll take a minute or two for the engine to properly start up. Don’t worry if nothing happens for a bit, because that’s quite normal. You’ll know the engine is working when you suddenly hear a loud and repetitive sound of thunder, and see arcs of electricity flying around. You should keep it on for a little bit and watch the energy ball generate smaller ones that float around it. It’s worth keeping in mind that the more of these small balls there are, the more electricity the Tesla engine will produce, and the further the bolts can travel. However, if it produces too many, the Tesla will grow too powerful for containment and begin to melt the equipment to escape. Roughly 8 to 10 balls is a good target, as that will max out the amount of power the SMES can input, and it won’t be strong enough to escape its cage.
Now, turn the PA strength down to 0 and leave it on, this should stop it from gaining more energy and will keep it sustained. Now, there’s no need to worry, the Tesla is up and running and likely powering the station! Make sure to check up on it over the cameras every now and then, just to be sure things are running smoothly, or check on it in person.
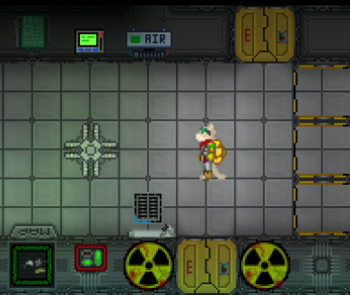
A PA on 0 looks like this:
TESLOOSE
In the event that the Tesla gets loose, the most important thing you can do is keep calm. The ball is capable of jumping z-levels, and it will vaporize any walls, windows, machines or people in its path, while also shooting blasts of lightning as it does so. Luckily, located in Hard Storage is an emergency beacon that exists for this very event that will save the day, called the emergency singularity beacon. It’s called this because it also works for an escaped Singularity, too.
Once screwed down, all you need to do is click on it with a free hand to turn it on, and it should light up. You should step behind it, not in between it and the raging lightning ball.
When the Tesla ball gets close enough, it will shoot a lightning arc at the beacon - which will turn it to ash. Don’t panic, that’s supposed to happen! After that happens, the Tesla ball will disappear.
Now that that’s handled; conduct repairs, and if necessary have evac called. You stopped the tesla, but depending on how long it has been rampaging, you might not have much of a station left. Survey the damage and pass on to the rest of command your opinion on the matter.
Final Notes
In the event that you need to start the Tesla due to an issue with the Supermatter -- most likely delamination, it’s important that you coordinate with the other engineers to get it set up as fast as possible, because starting the Tesla is not easy when you lack any power in the Tesla Bay APC, which is what the Particle Accelerator draws from. If you need to set it up, and power is low, make sure to bring some extra charged power cells to swap out with ones in the APC -- or bring along a PACMAN generator, and temporarily disconnect the cable that leads out into the station’s main grid, so that you can keep the APC powered, and the PA functioning, until the engine is properly up. Also remember: if someone tells you that setting up the Tesla is a bad idea, that you’re not allowed to without the Captain’s/CE’s permission (though please ask your CE’s permission if you do have one), that it’s dangerous, or that it can’t power the station; then politely inform them they’re wrong, and set it up anyway. It’s always a good idea to have a backup, you don’t need permission unless it’s explicitly prohibited by Command, and it can power the station, so don’t listen to them. Be the hero that the station needs.
Enjoy your much more interesting engine!
